
Salesforce Lightning Tutorial: Lightning Component basics
Salesforce Lightning Tutorial: Lightning Component basics
Chapter 1: Prerequisite for Lightning Component Development
My Domain
Before we begin to deep dive into the development of Lightning Component we need few things to be enabled in our Developer Edition Org. First thing is to enable My Domain in the DE org. Enabling My Domain and activating it can take up to half an hour, therefore we need to have My Domain as early as possible for any development.
Adding a Custom Domain, serves many other purposes as well, which are mentioned below:-
- Highlight business identity and unique domain URL.
- Login screen can be branded and customized.
- Work in multiple Salesforce Org at the same time.
- Set up custom login policies.
- It is a required feature for Single-sign On facility and Lightning Components.
My Domain is also available for sandboxes and more info about My Domain can be found in the Below mentioned document.
https://help.salesforce.com/articleView?id=domain_name_overview.htm&type=5
Before we begin the development lets create the custom object that we require for this tutorial.
To create a new object in the Lightning Experience(LEX), follow the below instruction these instruction are given assuming the you have enabled the Lightning experience in your org or you already have it enabled.
- Go to Object Manager, by clicking on the gear icon on the top-right of your org, then click on the Setup.
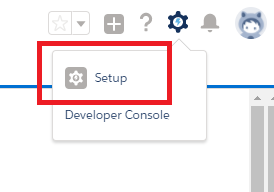 Fig 1.1: Setup link
 - A new window will open, click on the object manager tab, this will open the list view of the objects presently deployed in you Org, now click on the create button and then click on custom object.
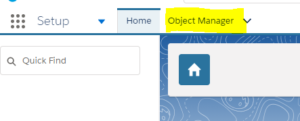
Fig 1.2: Object Manager Tab
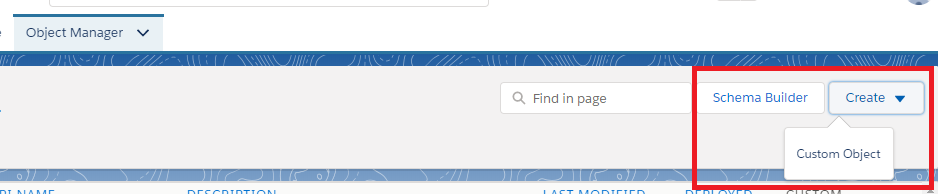
Fig 1.3: Create button
- Now fill up all the required fields i.e. Label, Plural Label, Object Name Record Name and its Data type, and other features which are mentioned below, accept all the default values other than the one mentioned below.
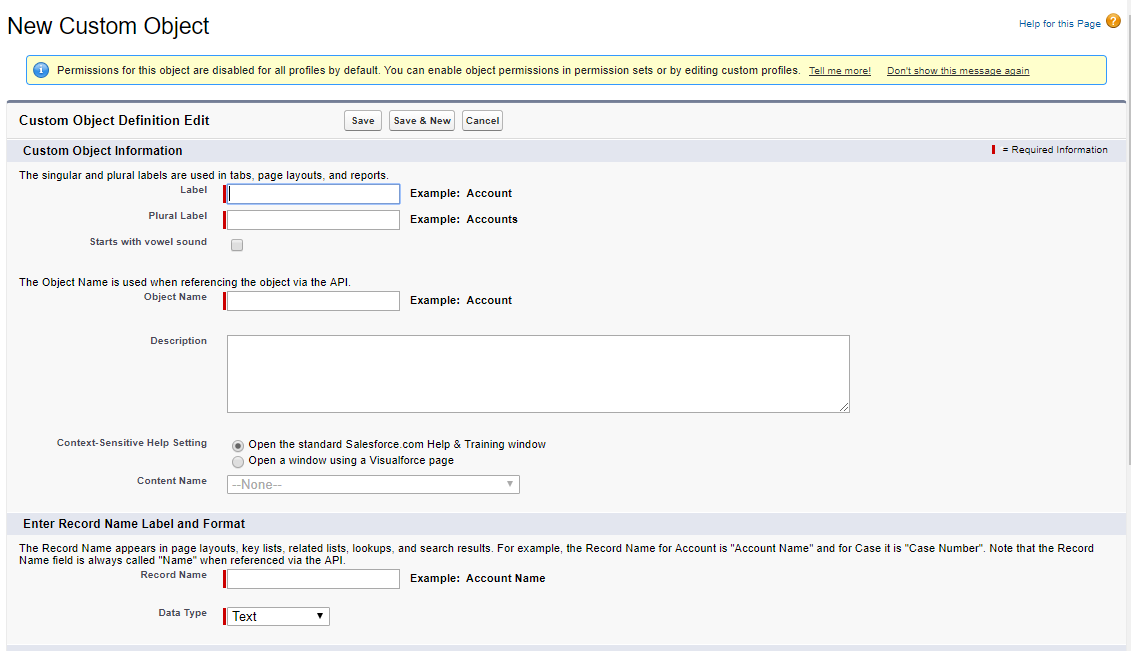
Fig 1.4: Object Definition Page
Field Value Label Expense Plural Label Expenses Starts With vowel sound checked Object Name Expense__c
- Once the object’s definition is saved, then on the object definition page, click on the link Fields & Relationships link and create custom fields on this object. Click on the new button, it will take you to the Data type selection screen.
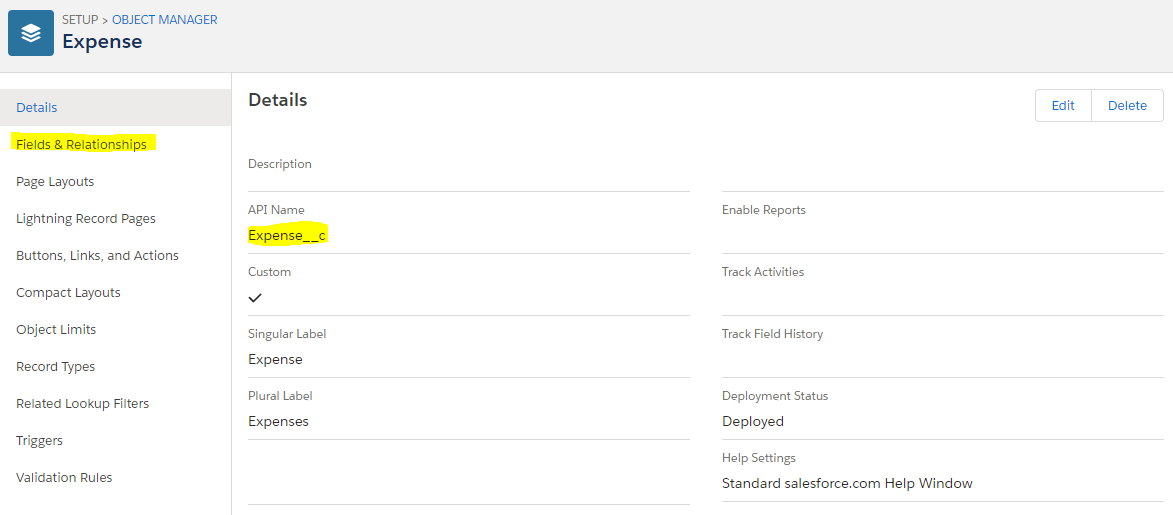
Fig 1.5: Object definition page
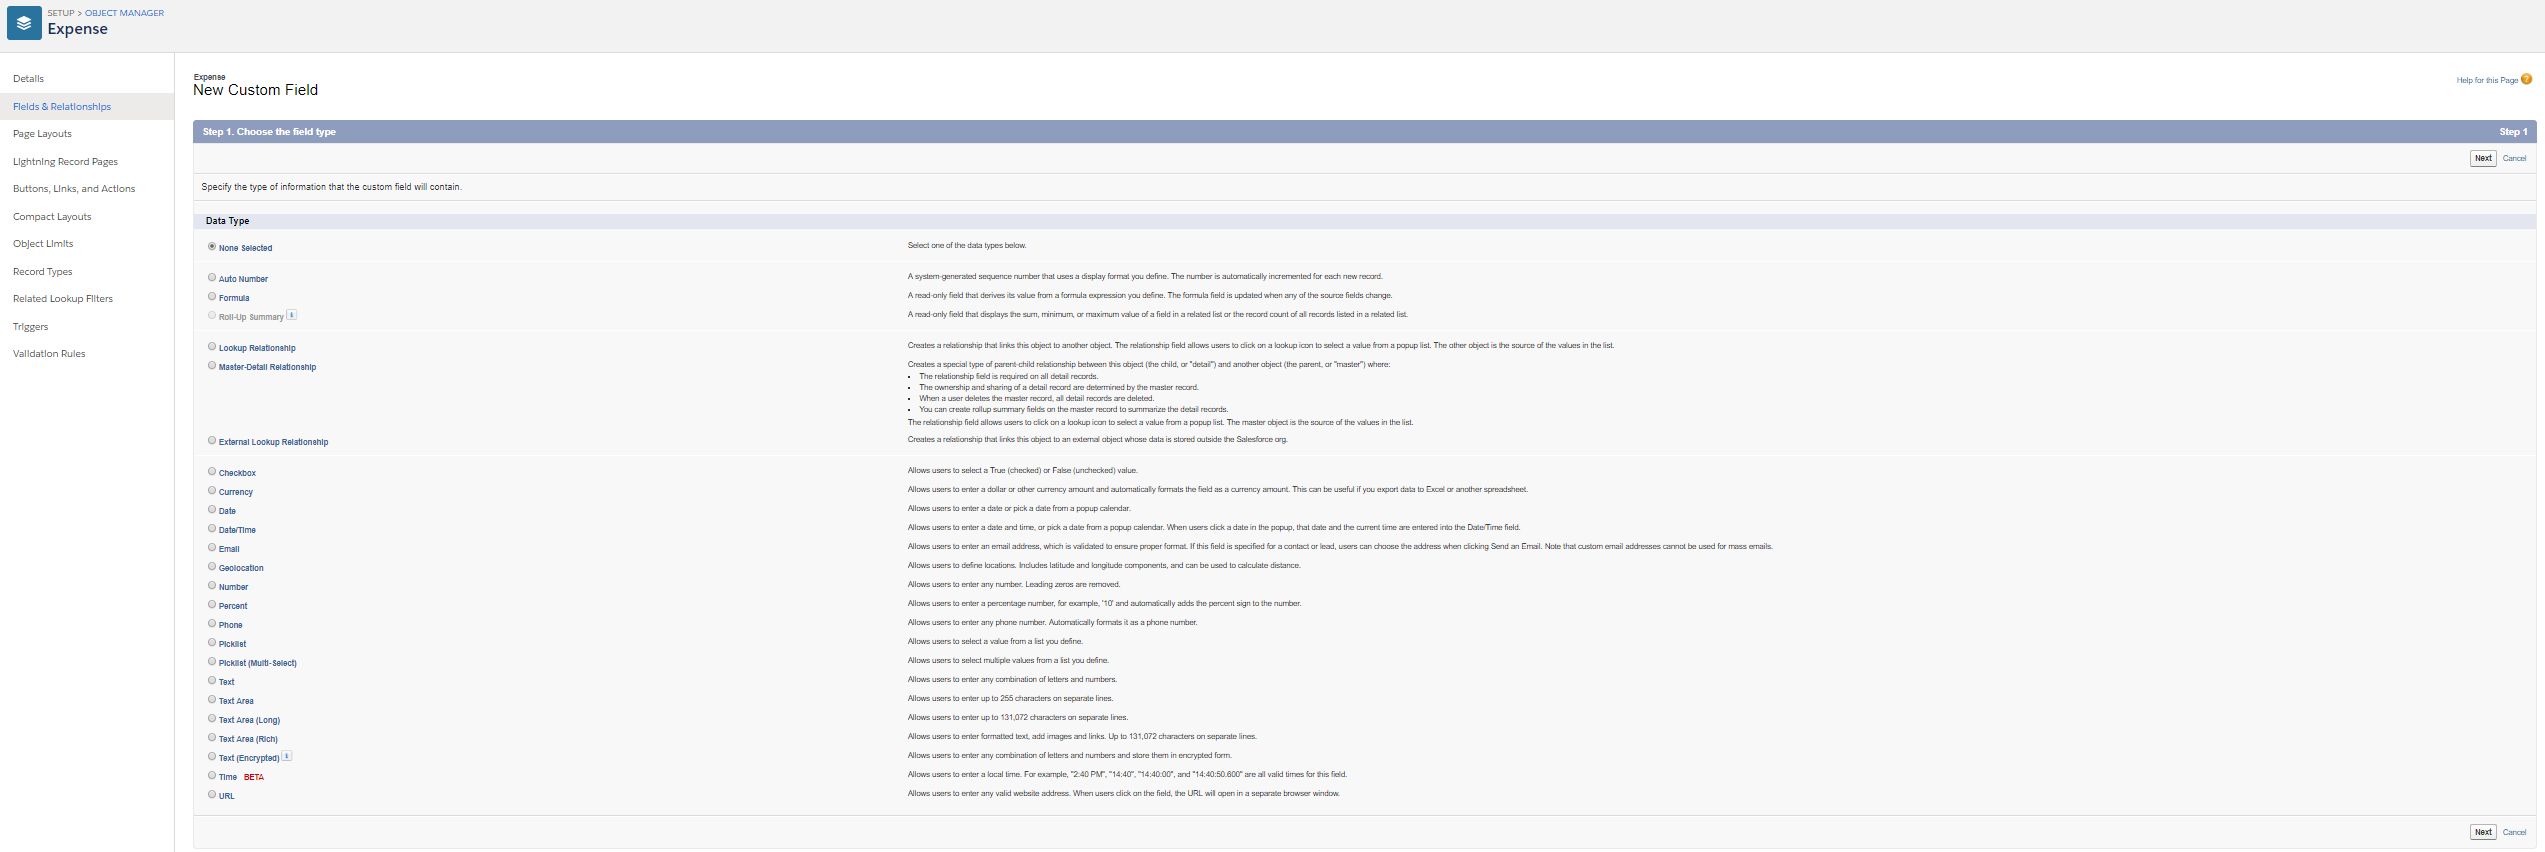 Fig 1.6: Field Data type Selection page
 - Create the below mentioned fields
Field Label API Name Field Type Amount Amount__c Number(16,2) Client Client__c Text(50) Date Date__c Date Reimbursed Reimbursed__c Checkbox Make sure that before we begin, you must have some knowledge of Apex Basics and Database, otherwise it would very difficult to understand some concept mentioned here.
Chapter 2: Getting Started with Lightning Components
Before we dive into the abyss of Lightning, first we need to know that why we should use lightning and what are the benefits of using the Lightning Component. Its benefit includes the following features.
- Out of the box Component set to kick start our app building experience, these components are smart and do not require optimization for different devices as they take care of it themselves.
- Performance, as we use stateful Client and stateless server architecture and rely on JavaScript on the client site to deal with all the UI component meta data and app data. Server calls are reduced as they are called only when they are necessary.
- Event Driven architecture, for better performance of components.
- Faster development device-aware and cross browser compatibility and component rich ecosystem.
Let’s know Lightning Components framework a bit more.
What Is the Lightning Components Framework?
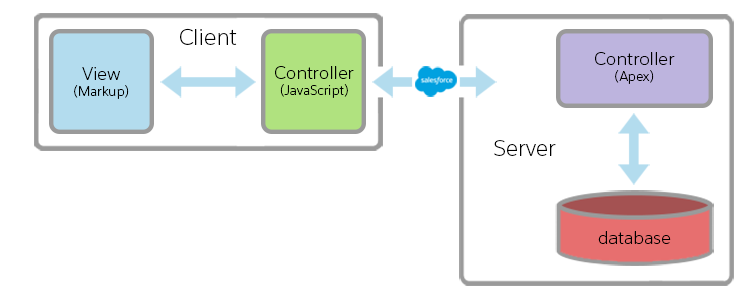
It is a UI framework used for developing apps which run both on mobile devices and desktop, it makes use of single page application architecture using dynamic, responsive components for the interface. It implements JavaScript on the client side and Apex on the server side.
 Fig 2.1 Lightning Framework
It is a framework with a collection of code and services to help developers create unique and modern Apps, it was born to build salesforce for mobile devices but later on it was decided to use this framework for both desktop and mobile devices. This framework is for building Single Page application.
Where You Can Use Lightning Components
Lightning components can be used in many different ways, like customizing the org, standalone app and even apps that can be hosted on other platforms (using Lightning out).
Lightning components can be embedded in LEX app launcher, as a tab in Salesforce App Navigation. They can be used in Lightning App Builder and Community builder.
Lightning components can be added to a custom lightning page, record page as a quick action or a standalone app.
Creating and Editing Lightning Components
Let’s begin writing some code and create awesome components for our org.
To write the code we need to open the IDE, which can be accessed by either clicking your name (in Classic) or the gear icon in the LEX.
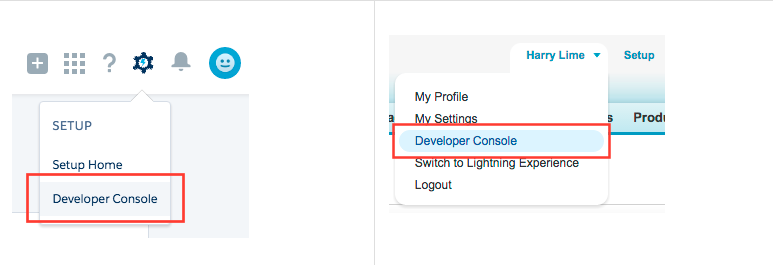 Fig 2.2: Developer Console link
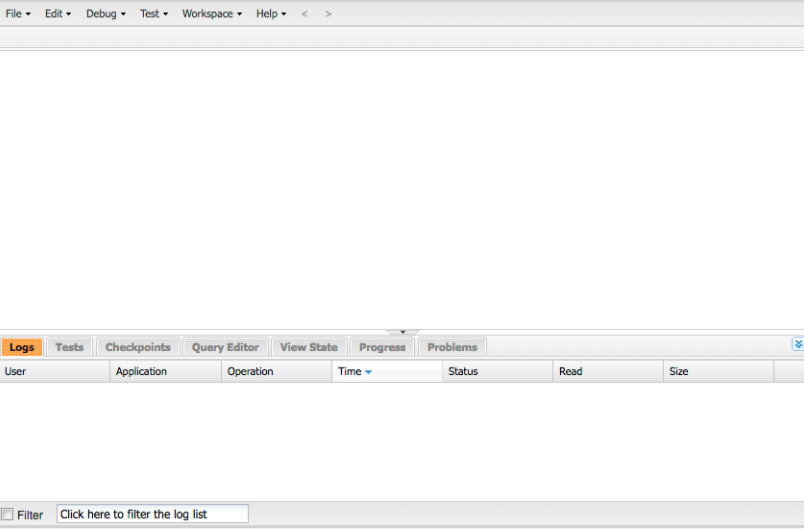 Fig 2.3: Developer Console Interface
Create Lightning Components in the Developer Console
To create a Lightning Component in the developer console follow the below instruction:-
- Click on file and then hover over the new menu and then click on Lightning Components, this will open another dialogue box as shown below.
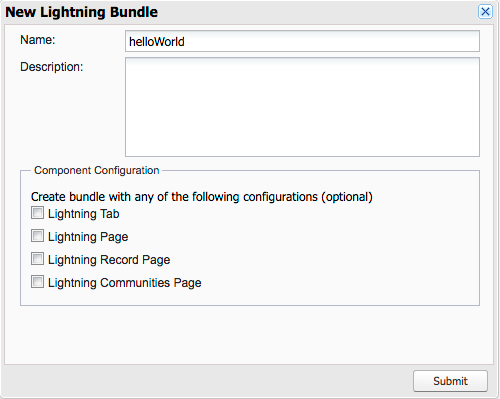 Fig 2.4: Lightning Bundle
- Give it the name helloWorld and click on submit button.
- This will open helloWorld component bundle and helloWorld.cmp as tabs. By default it provides us with opening and closing tag of aura:component, for this section just type <p> Hello Salesforce Lightning </p>
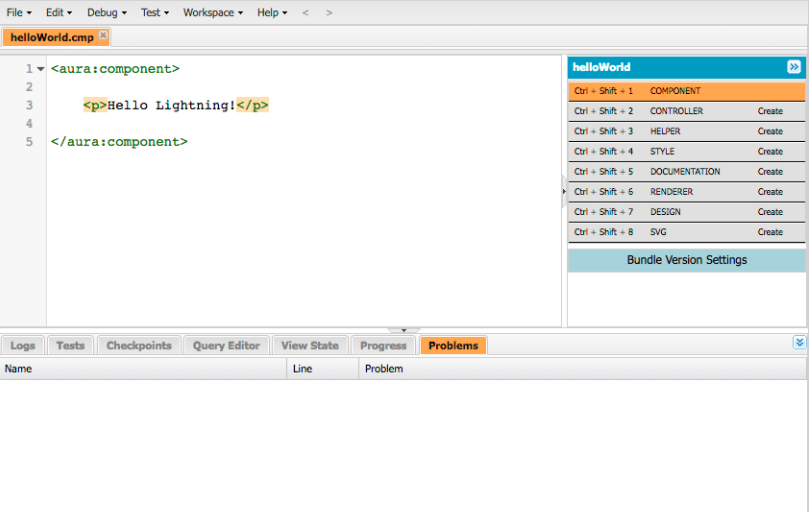 Fig 2.5: HelloWorld Component
We have created our first component, now how to view this component, it is not as simple as Visualforce Page. To view Lightning component we first need to put in a container app. Let us make a simple container app for our helloWorld Component.
For creating the App follow the below instruction:
- Click on file and then hover over the new menu and then click on Lightning Application, this will open another dialogue box which is the New Lightning Bundlepanel, enter the name of our container app “harnessApp” for the app name, and click Submit you will have something as shown
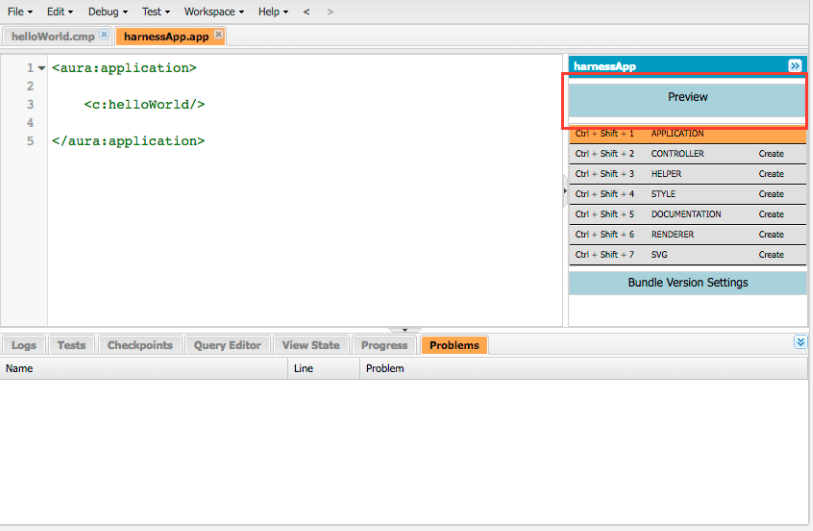 Fig 2.6: The container App
- This app will have <aura:application> tag written by default, just type <C:helloWorld/> inside these tags and click on save. The difference between a Lightning App and component is visible on the right side panel. In App there is a preview button and in the component there is no preview button.
So here you see how we created a component and then hosted it inside a Standalone Lightning App. So you must be wondering that, what a component is. So without a further adieu let’s dive deep into the component.
What Is a Component?
A Component is a bundle which contains set files, written and wired in such a way that they accomplish a common business goal .They are coherent yet loosely coupled set of code and form the basic building block of Lightning Component Framework. It encapsulates a modular and reusable piece of UI and can range from single line of text to entire application. Let’s discuss about the component’s mark up next. Component resource has a .cmp suffix. Below is an example of the component mark up.
<aura:component>
Hello, world!
</aura:component>
This is as simple as a component can be in our helloWorld.cmp
Component Naming Rules
A component name must follow these naming rules:
- Must begin with a letter, contain only alphanumeric or underscore characters, it must be unique in the namespace
- Can’t include whitespace, end with an underscore or contain two consecutive underscores.
Component Bundles
A component bundle consists of files and resources grouped together to achieve a common goal, it contains the following resources:-
- Component: resource name has suffix of .cmp and it contains all the mark up of the component. Each bundle can have only one component.
- CSS: resource name has suffix of .css and it contains all the styling of the component
- Controller: resource name has suffix of .js and it consists of client-side controller methods to handle the events.
- Design: resource name has .design as the suffix and it is required for a component to be used in lightning app builder, lightning pages or community builder
- Documentation: resource has .auradoc as suffix and is a description of the component, sample code and one or more component reference.
- Renderer: resource name has .js as a suffix and is used to override client-side renderer for a component.
- Helper: resource has .js as its suffix and it contains JavaScript Functions that can be called from any JavaScript code in the components bundle.
- SVG File: resource has .svg as the file extension and it contains custom icon resource for the components used in lightning App Builder or community builder.
Next we will start making our component a little bit more complex by using attribute and expressions.
Also Have a look at the below resources:
Also Have a look at the below learning resources:


Pls share the salesforce Integration doc